To deploy an os to a production ready environment, one must install the following first:
Git for windows – ensure you allow adding to path variable, and include running unix tools natively.
Ruby 2.1.7 – http://rubyinstaller.org/downloads/
Vagrant 1.7.4+ – https://www.vagrantup.com/
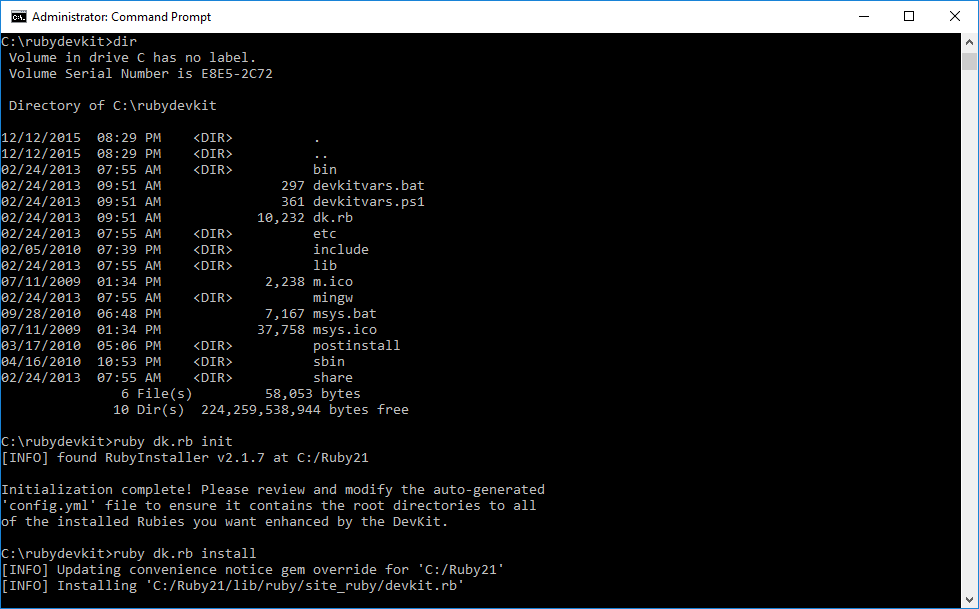
Next, we must run the dev kit installation –
Ruby DevKit for 2.0+ mingw64-32-4.7.2 – http://rubyinstaller.org/downloads/
more detailed instructions for devkit (basic detail is given below) https://github.com/oneclick/rubyinstaller/wiki/Development-Kit
Download and double click. When prompted, extract to c:\rubydevkit and finally, initialize a command line from that directory.
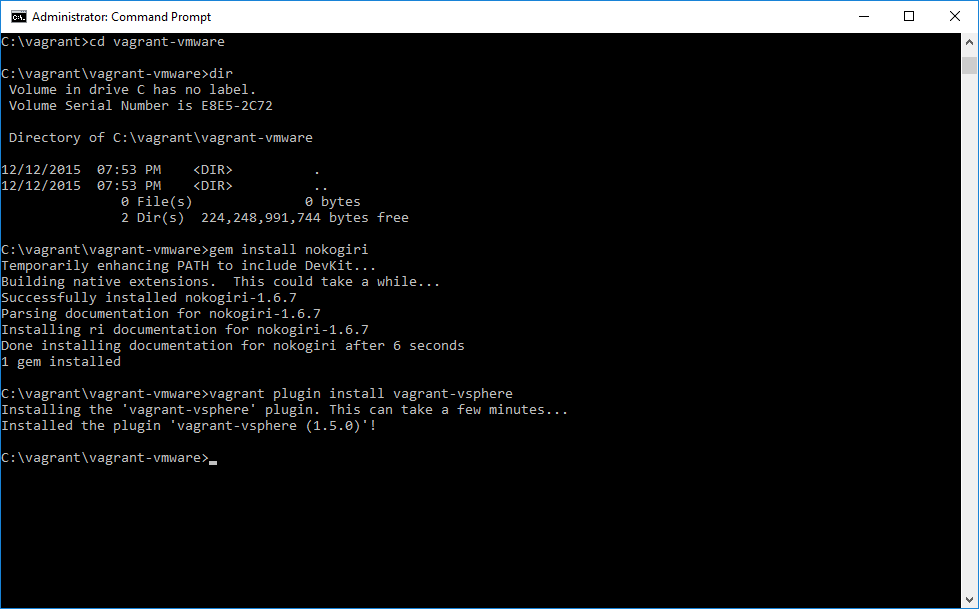
After initialization of the devkit, we need to install nokogiri, a prerequisite for the vagrant-vsphere. I create a directory c:\vagrant for my vagrant projects, and the initial vm we bring up will be from the vagrant-vmware subdirectory. We install the vagrant-vsphere plugin, graciously provided to the open source community by the National Snow and Ice Data Center. Further details can be found here: https://github.com/nsidc/vagrant-vsphere
The established norm for DevOps team is to keep base box files in a directory at C:\boxes\operatingsystemversion cloned from Stash, vis a vis C:\vagrant\projectname and vagrantfiles
At this time, it is important to note something here. The typical behavior for vagrant is to spin up a virtual machine (in virtualbox by default) based upon a box file. If you do not have a requied box file, vagrant will try to obtain the box file from the relevant repositories (hashicorp vagrant cloud repo). If you specify a local URL (as we have in our vagrantfiles for other projects) such as file:\\C:\boxes\centos7.box the box will be decompressed into the working directory where vagrant keeps all the other boxfiles it would get from Hashicorp’s site, or elsewhere.
With the NSIDC vagrant-vsphere plugin, we require the use of a custom box file. This is as basic a box file as possible, and is simply there to satisfy vagrant’s requirements of having a vaid box file to base the system off of. The box file should be composed of a tar gzipped metadata.json file, with the contents of the metadata file below:
{
“provider”: “vsphere”
}
It should be noted, we are actually basing this off of a template and customization specification in vSphere, rather than basing upon a box file.
To test our configuration, we are going to use the vagrantfile provided by the NSIDC, fill in our details and vagrant up. You can find this under Usage at the following url as excerpted below, with additional inline detail: https://github.com/nsidc/vagrant-vsphere
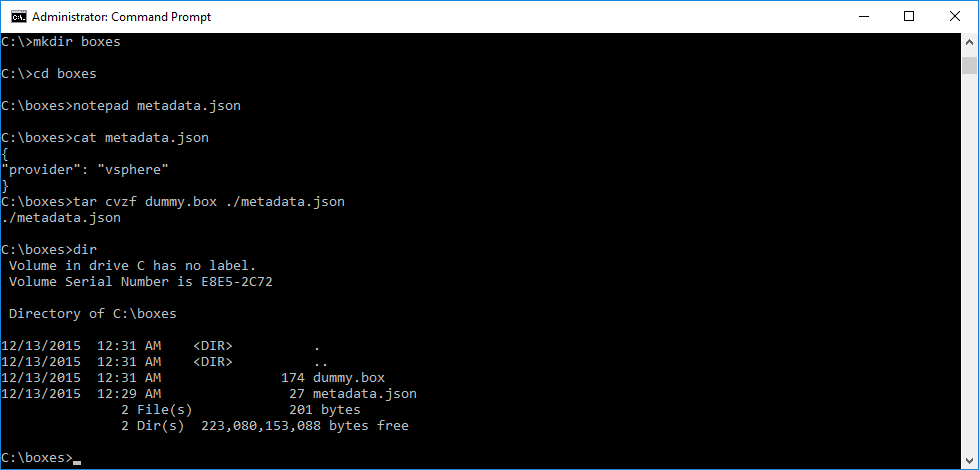
After installing the plugin, you must create a vSphere box. that can be used to create a dummy box with the command:
tar cvzf dummy.box ./metadata.json
This can be installed using the standard Vagrant methods or specified in the Vagrantfile.
After creating the dummy box, make a Vagrantfile that looks like the following:
Vagrant.configure(“2”) do |config|
config.vm.box = ‘dummy’
config.vm.box_url = ‘./example_box/dummy.box’
config.vm.provider :vsphere do |vsphere|
vsphere.host = ‘HOST NAME OF YOUR VSPHERE INSTANCE’
vsphere.compute_resource_name = ‘YOUR COMPUTE RESOURCE’
vsphere.resource_pool_name = ‘YOUR RESOURCE POOL’
vsphere.template_name = ‘/PATH/TO/YOUR VM TEMPLATE’
vsphere.name = ‘NEW VM NAME’
vsphere.user = ‘YOUR VMWARE USER’
vsphere.password = ‘YOUR VMWARE PASSWORD’
end
end
And then run vagrant up --provider=vsphere.
The basis of the vm resulting from use of the vagrant-vsphere plugin is a VMware template on our vsphere server. Creation of a custom vagrant box is out of the scope of this document, but was fairly straightforward. Both Windows and Linux can be deployed in this method, as we will see soon.
Following the above instructions, creating a boxes directory, creating a metadata.json file, zipping it up, and renaming the tar.gz file to .box:
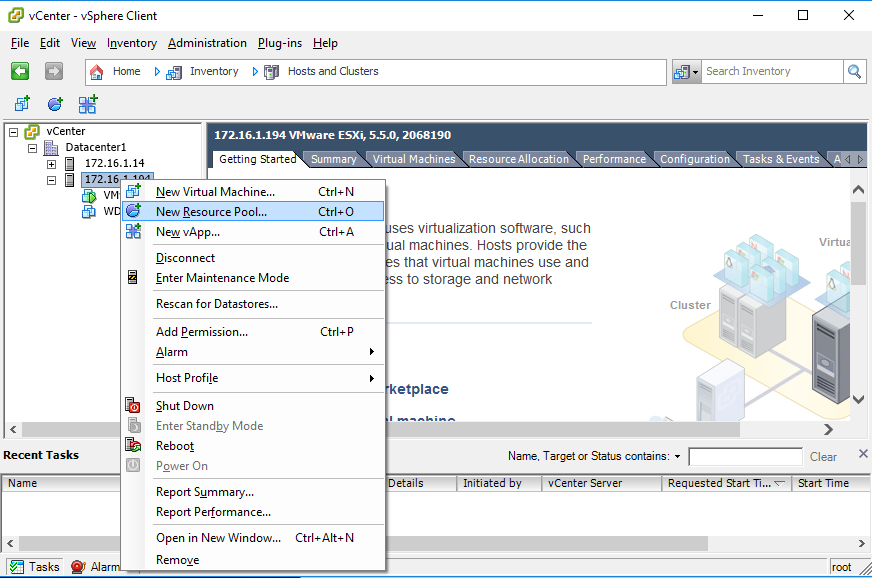
Next, we prepare our VMware environment. First, create a resource pool and allocate sufficient resources for the vm you would like to provision by right clicking on the vSphere instance, and selecting New Resource Pool, or by typing Ctrl-O:
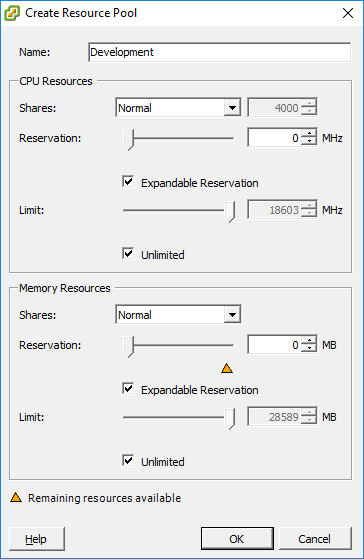
In this case, I’ve named my pool “Development” and accepted the default unlimited allocation:
Next, let’s upload our centos7.vmdk base hd to the datastore appropriate to your installation, in this case we renamed our datastore Development:

We need a template, so we must create our VM (at this point, install an OS if you do not have a prepared image) and adjust it’s settings for our environment. Then we can convert our VM to a template.
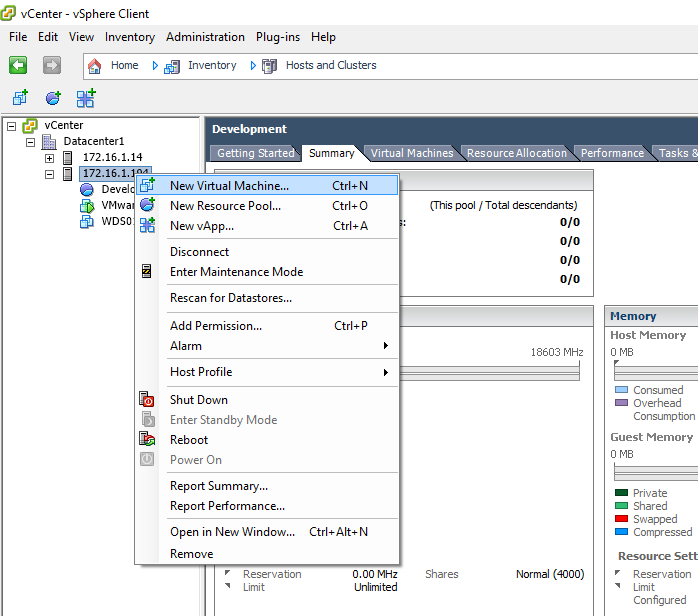
Begin by right clicking the appropriate host in vSphere client, and selecting New Virtual Machine, or type Ctrl-N:
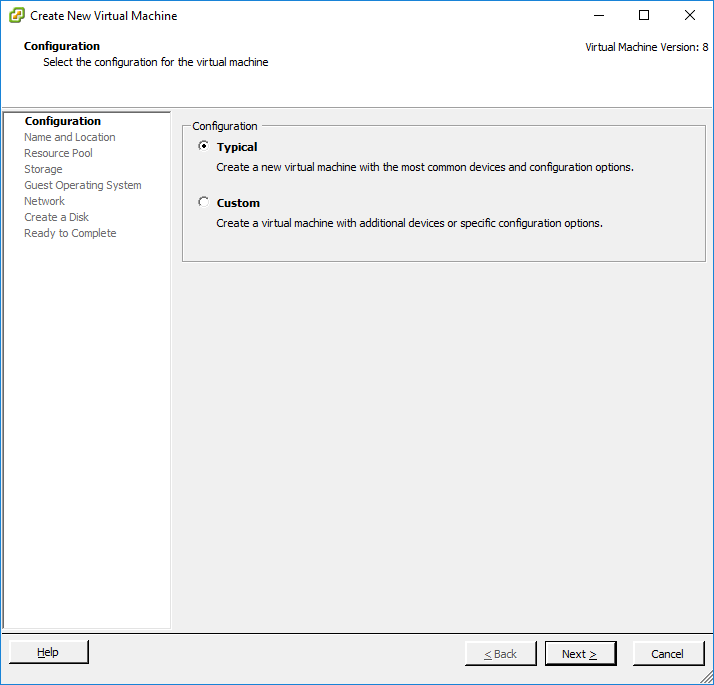
Select Typical and click Next:
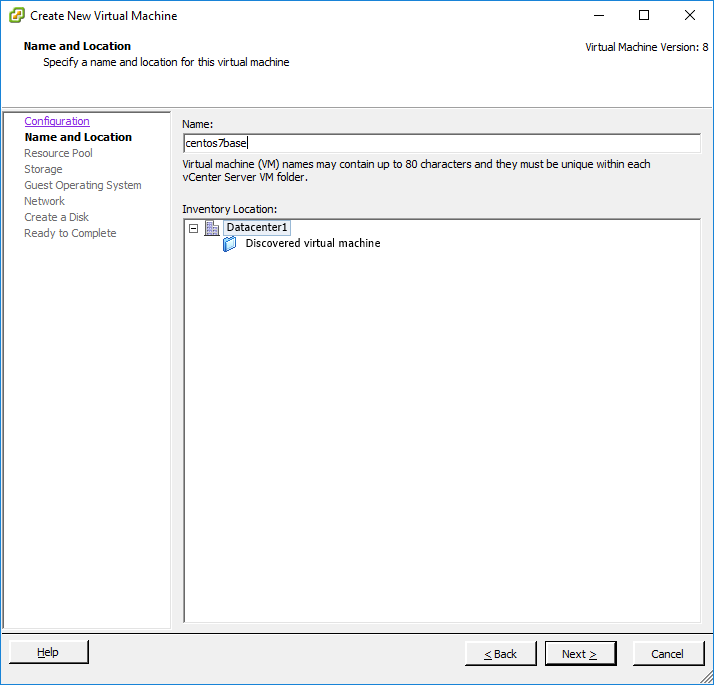
Name the VM appropriately, and click next:
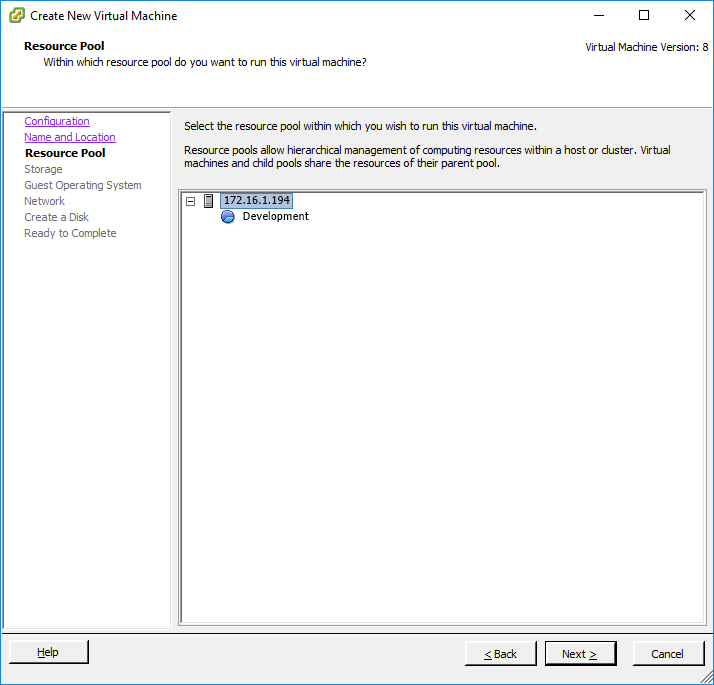
We will place this in the root of our VM so it’s available to all our resource pools:
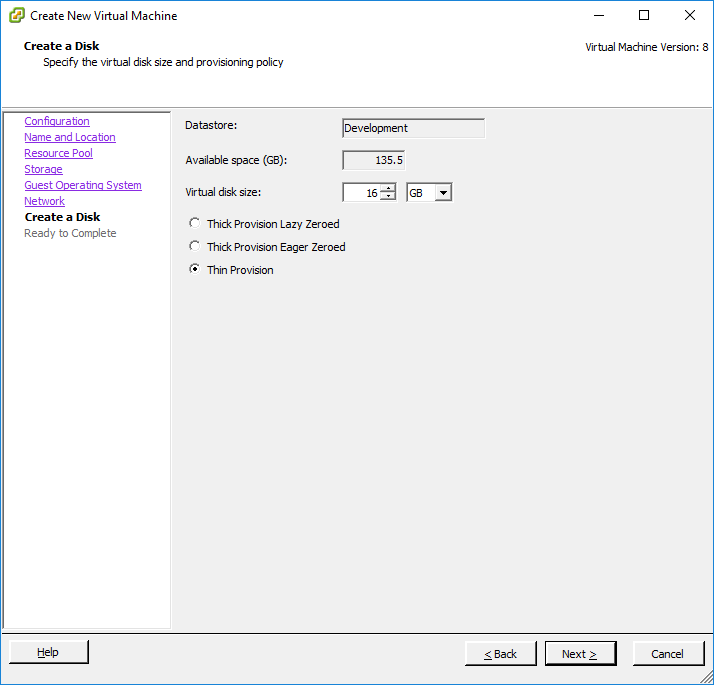
In our case, we will specify the Development SSD for deployment (we cruise in style here):

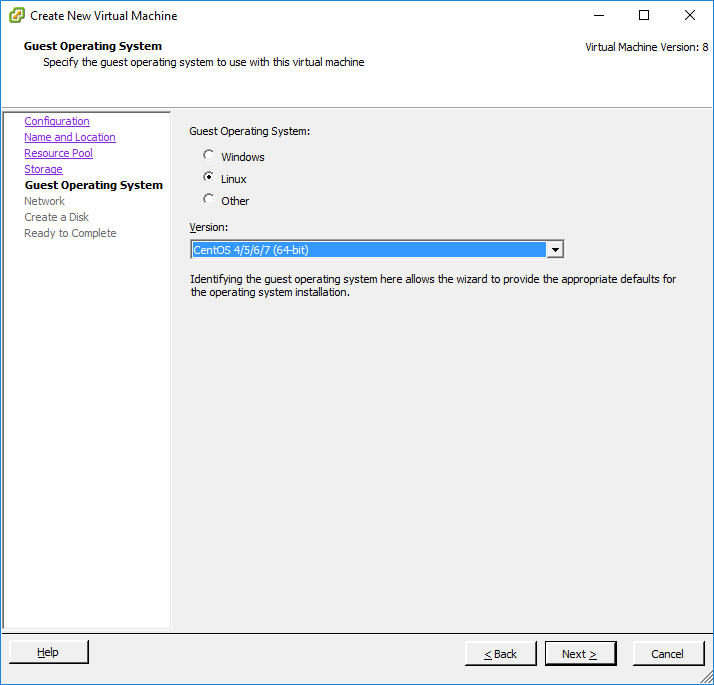
Specify the appropriate OS for your deployment, in this case we are using CentOS 7:
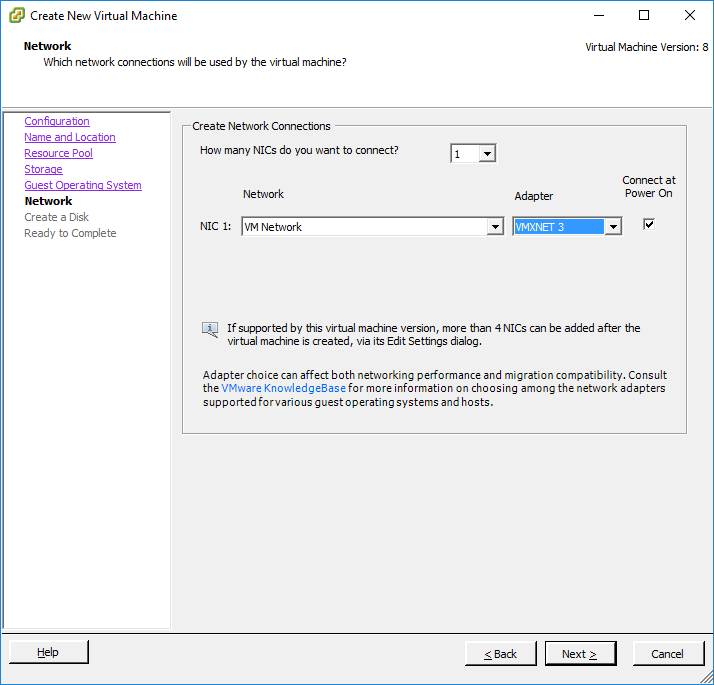
Ensure you use an appropriate network card. In vCenter 5.5 there is a bug with Windows Server 2012 R2 which causes the machine to be unavailable from the network unless steadily pinged. Select VMXNET 3 if this is the case:
Go ahead and let it create a disk, as we will replace it in the following steps:
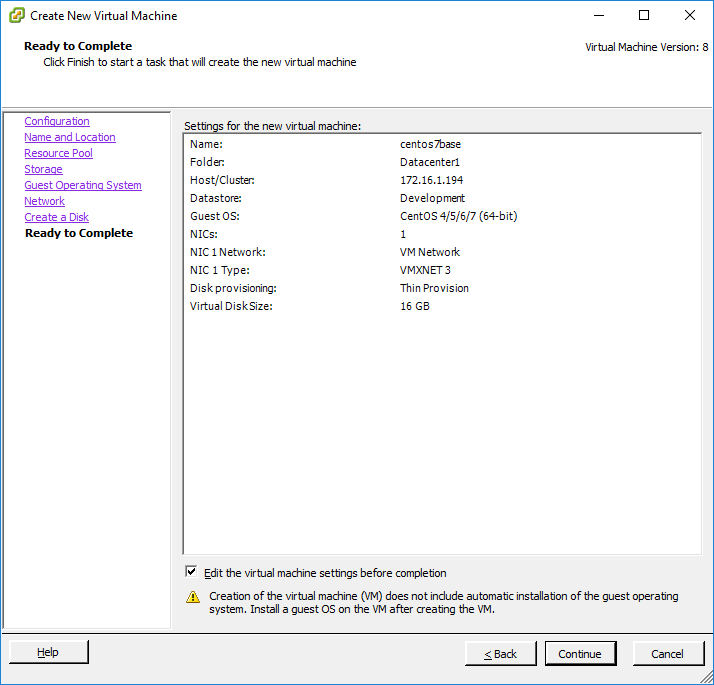
Go ahead and edit the settings before finishing the machine creation by checking the Edit box at bottom left:
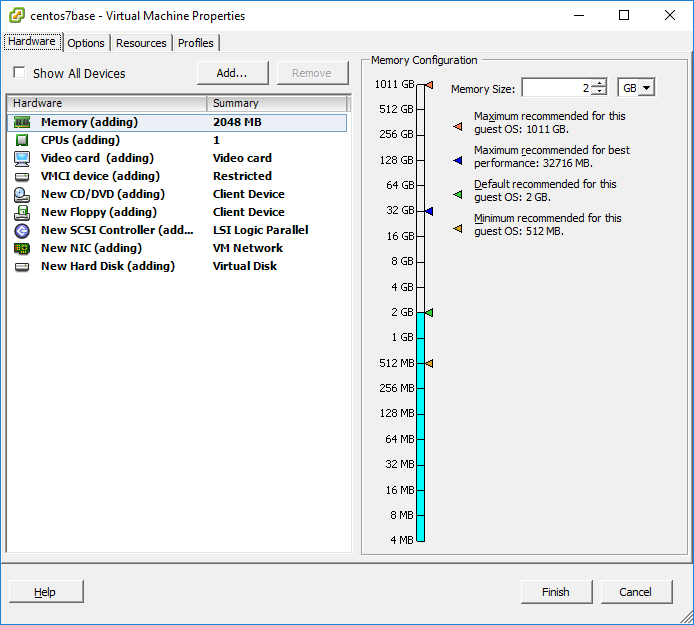
To make deployment faster, we are going to gut the box. Remove the Floppy drive, and the New Hard Disk by highlighting them and selecting remove.
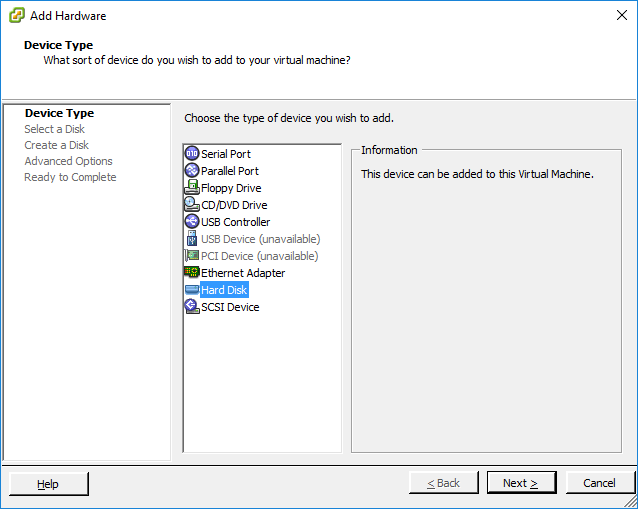
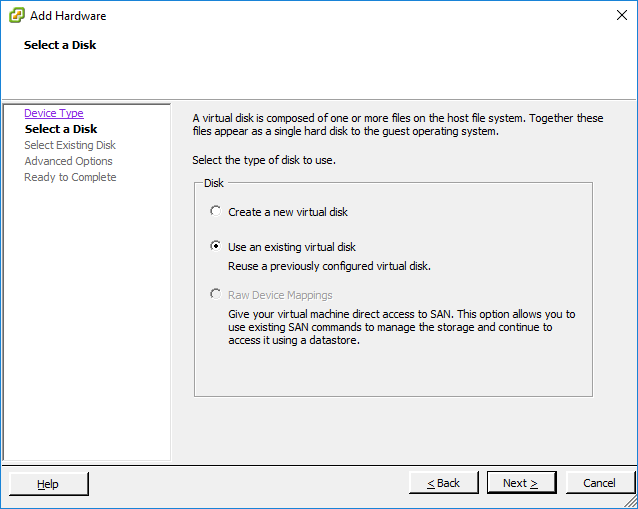
Click Add to add our vmdk we uploaded previously (skip this step if you are custom installing an OS at this point). Select Hard Disk and click Next:
In our case, we are going to select Use an existing virtual disk:
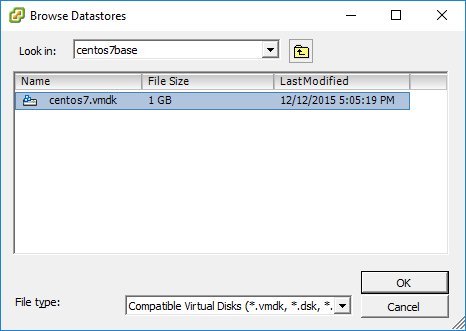
Browse to the appropriate datastore (Development in this case) and into the appropriate folder. Select the vmdk file and click OK, then Next:
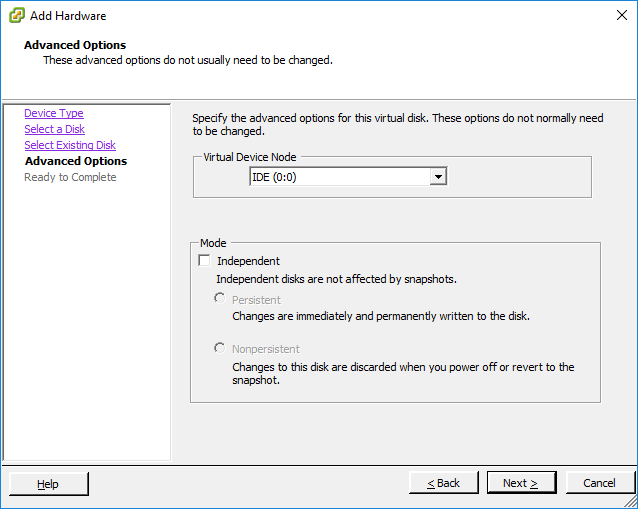
Leave the settings default for this step, and click Next, then Finish:
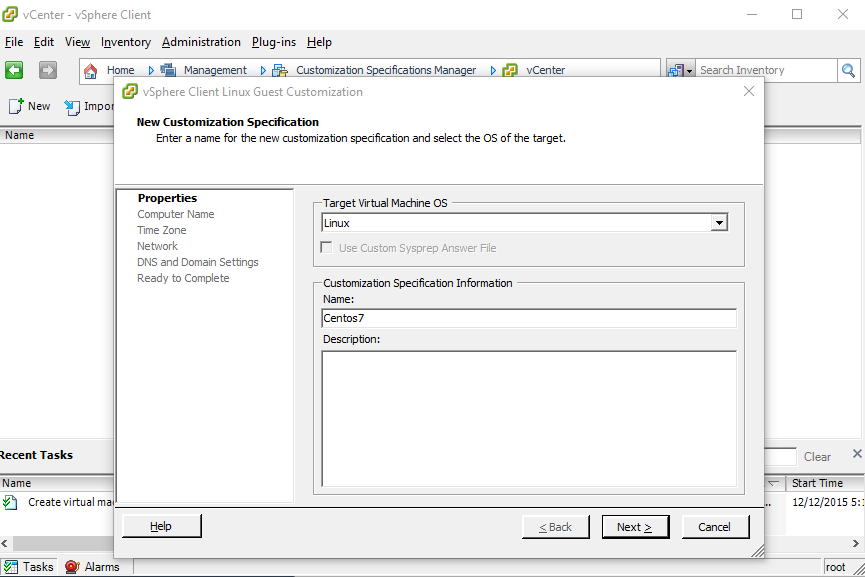
Now that we have created our VM, let’s create a customization spec by clicking on Home at the top, and selecting Customization Specifications Manager:

At the top left, click on New, then select the appropriate target OS and assign a name to the customization specification. Click Next to continue:
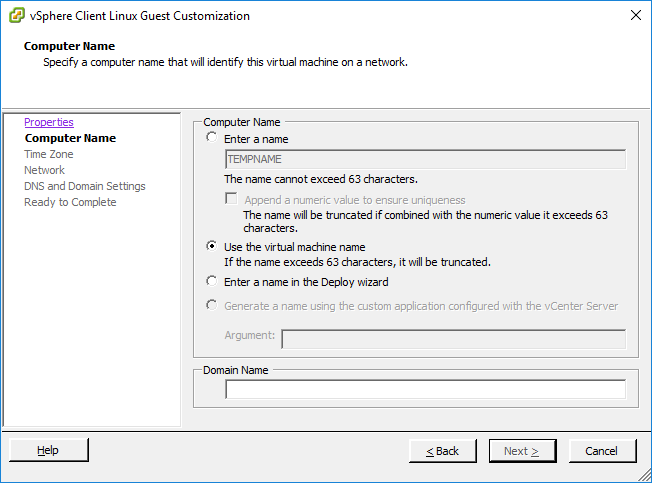
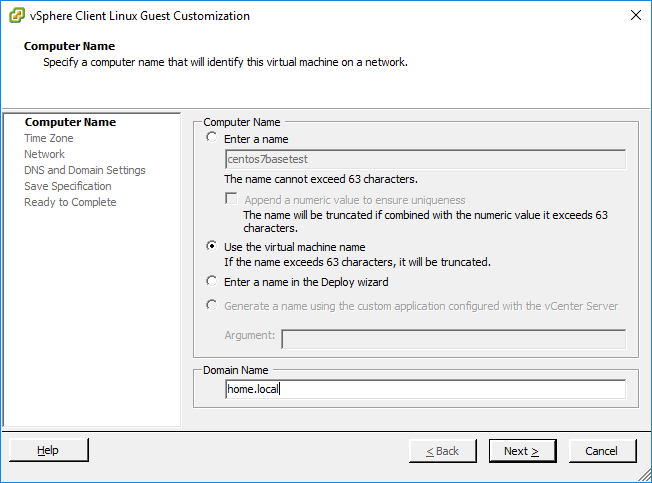
Next, select Use the virtual machine name to ensure that we dynamically can allocate a hostname to the VM. Enter a Domain Name to append to the host’s name:
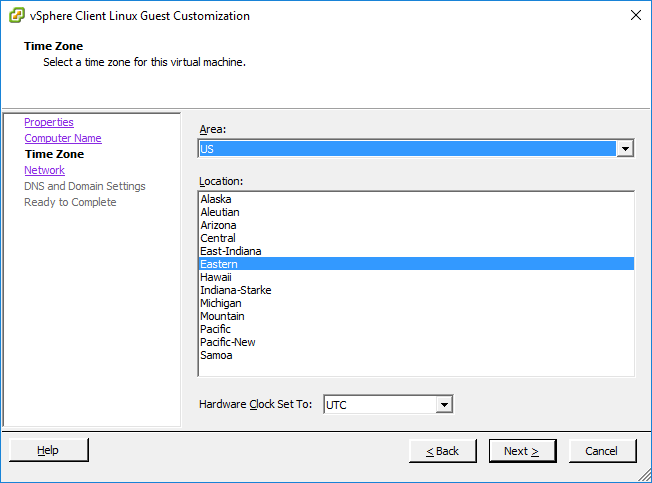
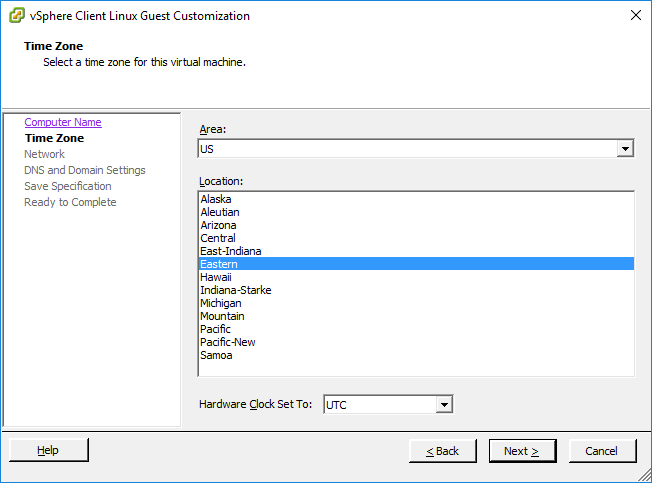
Select an Area and Location to enforce time zone:
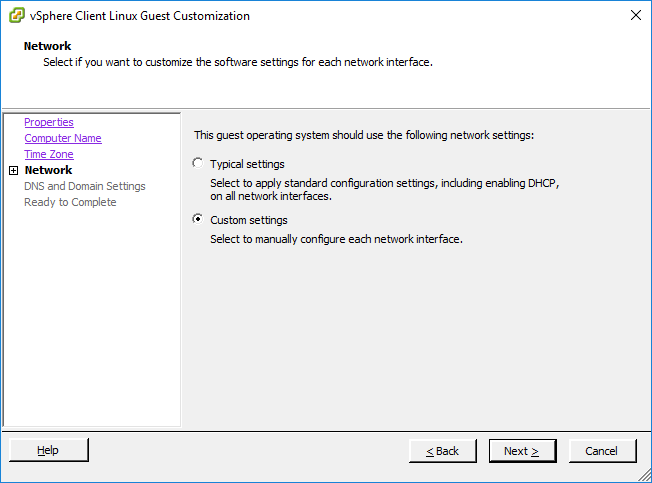
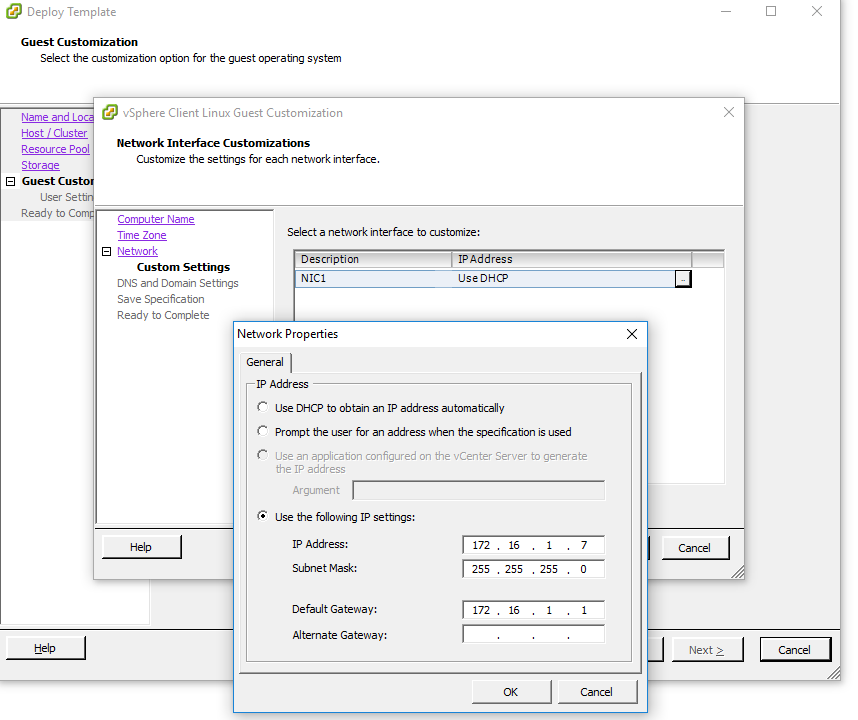
In order to specify network settings from the vagrantfile, ensure Custom Settings is specified:
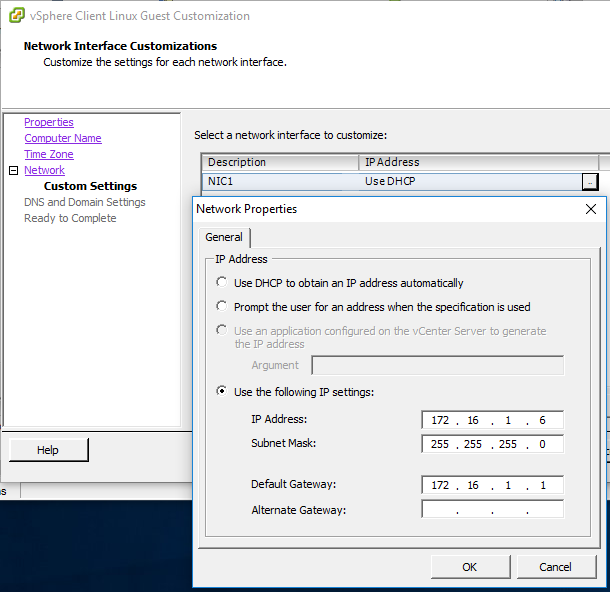
To specify the static network configuration, click the ellipses next to “DHCP” and specify the network settings. Click Next to continue:
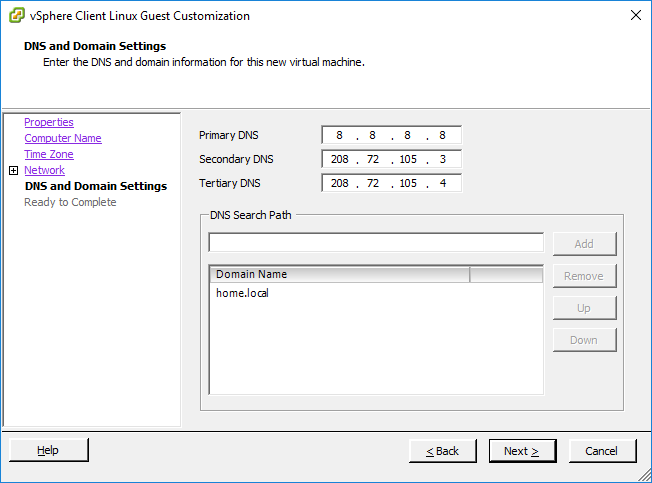
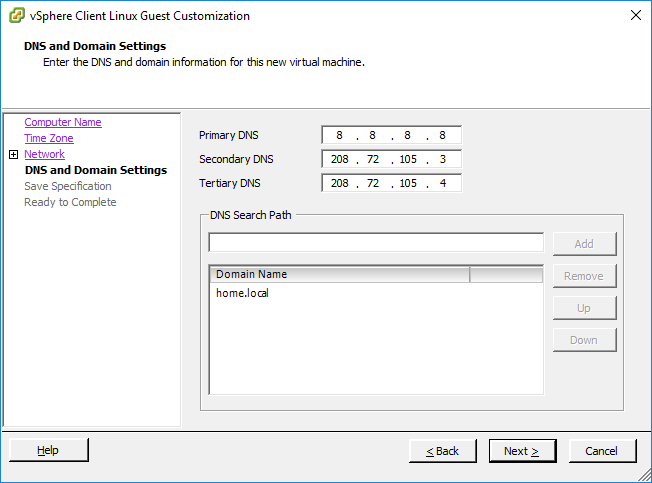
Input the appropriate DNS server values you would like your VMs to have as well as a default domain for default DNS search path resolution. Click Next, review your settings, and click Finish:
Ensure you boot and install the OS appropriate version of VMware tools if this has not been completed yet, and shut the machine back down.
Ensure if you are installing via your OS’s package manager that you install open-vm-tools and open-vm-tools-devel packages both, or the customization templates will not work.
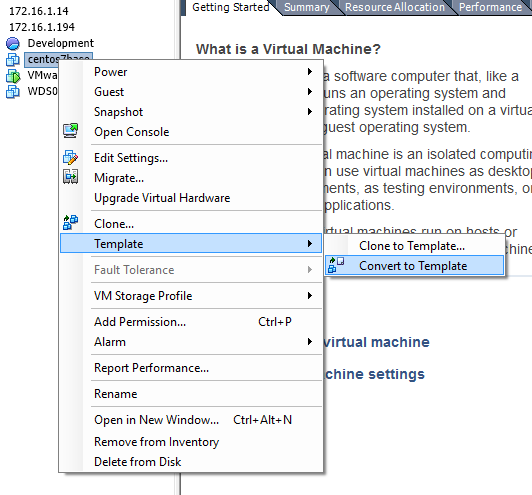
Now we can convert our VM to a template by right clicking the VM, and selecting Template -> Convert to Template:
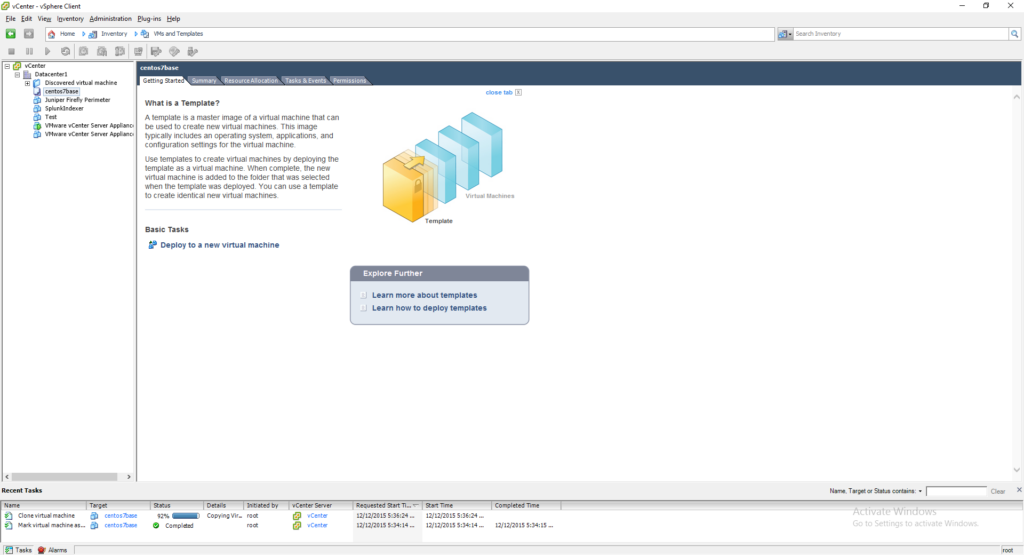
The VM will disappear from the present view. To see the templates in the future, you must navigate to Inventory, and select VMs and Templates:
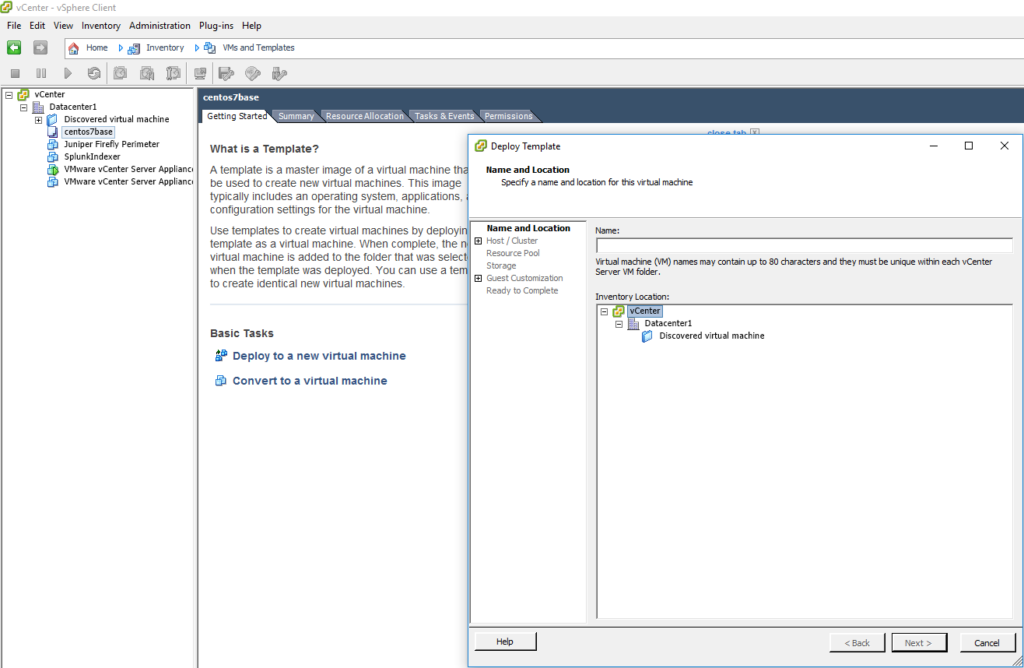
Now we can simulate the deployment process. This step is highly useful if you are creating a limited user account to deploy with (Highly suggested, but due to granularity, will be a topic for another day).
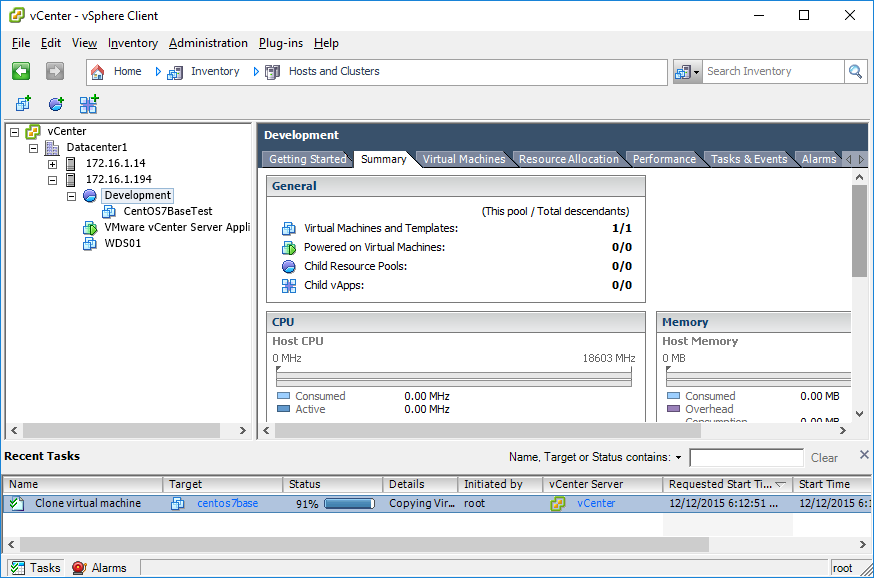
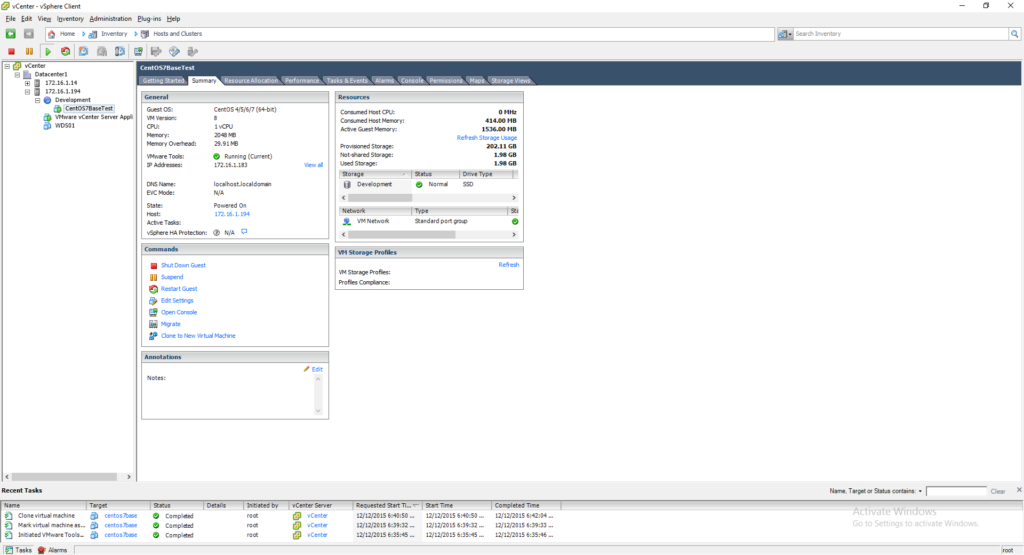
Select your base cm, and at the right under Basic Tasks, select Deploy to a new virtual machine. Type the name of your VM, in our case CentOS7BaseTest, select the appropriate Datacenter, and click Next:
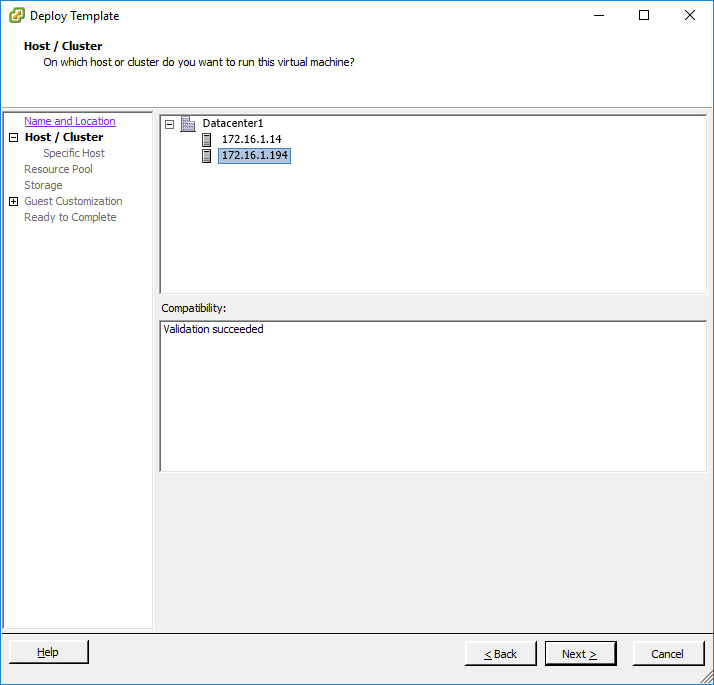
Select the appropriate host and click Next:
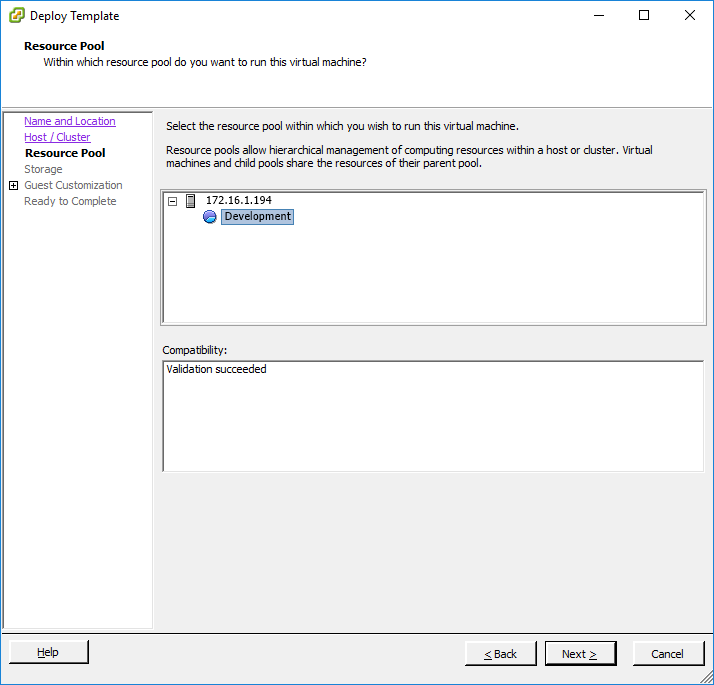
Select the appropriate resource pool from the selected host, in our case Development, and click Next:
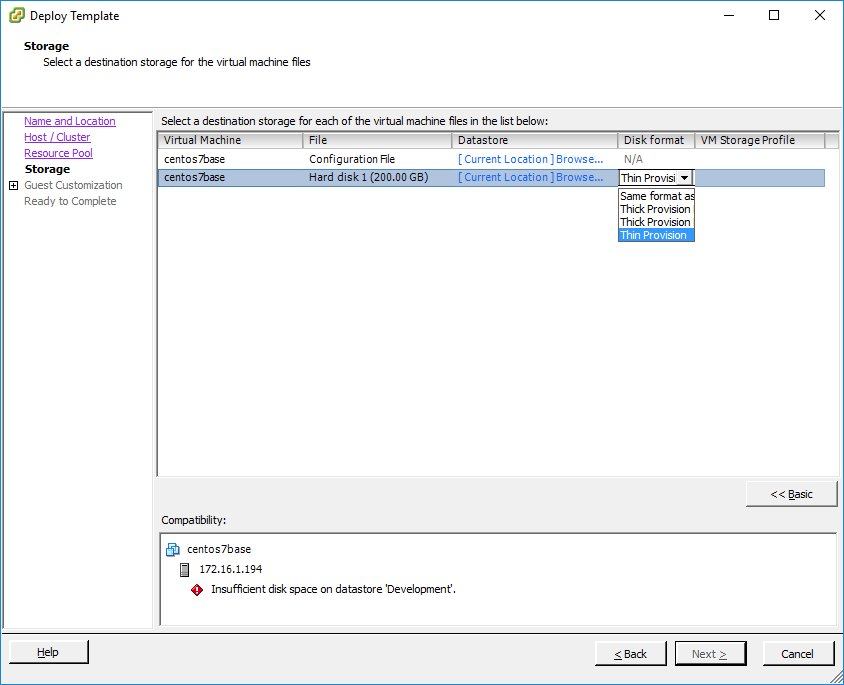
Click on Advanced, and under Disk Format dropdown, select Thin Provision and specify the Datastore by clicking on the link under Datastore column:
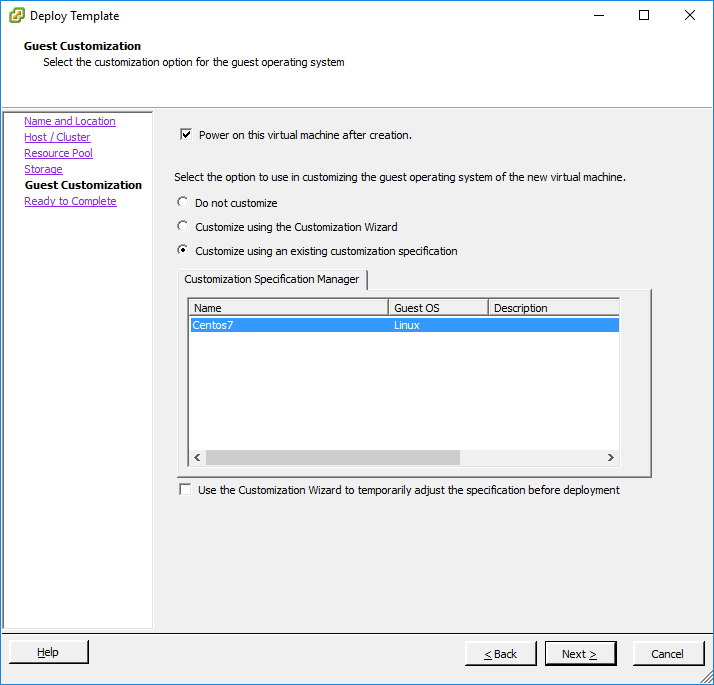
Of course we want to bask in the glory of our newly created server, so check the Power on box, and select Customize using the Customization Wizard to build a custom box. Alternatively, you can select Customize using an existing customization specification, select the one we created above (in our case Centos7) and complete the process
If you need to do a manual process, or if you want to use the customization specification as a base, run the Customization Wizard with the checkbox in the preceding screen:

Specify Use the virutal machine name to inherit the VM name from the vagrantfile. Specify the local domain name to append to the name, in this case home.local. Click Next:
Select the Area and Location for the time zone specification:
Specify Custom Settings:

Click on the ellipsis next to DHCP, and input the IP address manually as desired and appropriate. Click Next:
Input the DNS server as required for the host, and the DNS Search Path preference, in this case home.local:
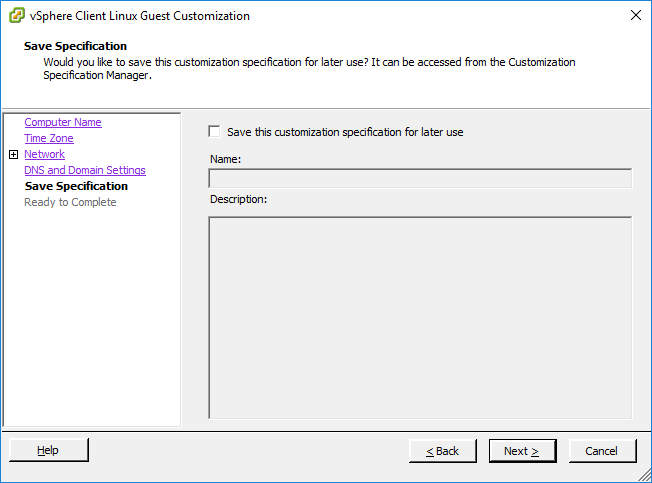
You can save or not, as is your custom, and click Next, Finish, and Finish again:
If we were successful, we should see our job created, and our new host under Inventory -> Hosts and Clusters
And here we have it. Note that the IP is only manually specified when the customization template is enforced by the vagrantfile:
Now we are ready to validate VMware and vagrant interoperability by inputing the above specified values in to the vagrantfile:
Vagrant.configure(2) do |config|
config.vm.box = ‘dummy’
config.vm.box_url = ‘c:/boxes/dummy.box’
#Set an IP Address
config.vm.network ‘private_network’, ip: ‘172.16.1.7’
config.vm.provider :vsphere do |vsphere|
vsphere.host = ‘172.16.1.11’
vsphere.compute_resource_name = ‘172.16.1.194’
vsphere.resource_pool_name = ‘Development’
vsphere.template_name = ‘centos7base’
vsphere.name = ‘centos7basetest’
vsphere.user = ‘user’
vsphere.password = ‘password’
vsphere.insecure = true
vsphere.customization_spec_name = ‘CentOS7’
end
end